

CHERYL WILLIS, (OzarkCastle) My Creative Side It is what it is- faith, family, fun and fabric!
Showing posts with label scrappy strings. Show all posts
Showing posts with label scrappy strings. Show all posts
Wednesday, November 21, 2018
Saturday, May 23, 2015
Scrappy Borders from gifted strings --Thanks, Dawn!
Dawn gifted me a baggie of scrap strings she picked up thrift shopping (Actually I don't know where she got them but the baggie looked like it had once had a tag on it--lol)
Wish I had thought to get a picture of the bag, this might have been more impressive if you could see what I started with!
Not shown is the new pile of crumbs (I used almost all the strings on the blocks and now have a bunch of little triangle (ish) shapes from the sub-cuts- wonder who I can gift them too?
Wish I had thought to get a picture of the bag, this might have been more impressive if you could see what I started with!
 |
| 24 (Twenty Four!) String blocks. Lucky for me I had a ton of 8 1/2 inch phone book pages already cut out. |
 |
| This is ALL the left over strips- Seriously ALL of it. Am I good or what? |
 |
| I tore the paper off before I ironed and resized the blocks. Left the pieces out to long and the cat found them. OK pick them up again- twice. |
 |
| Love my Studio die cutter. The blocks were sub-cut into 2 1/2" strips Half were cut with the diagonal pointing left the other half pointing right. I did not worry about squaring up the blocks before the sub-cut. |
 |
| I knew I wanted to use the new strips as a border on an existing work in progress. I auditioned a couple of tops and settled on this one. More scrappy pieces that Dawn had given me from a friend of hers years ago. |
 |
| Strips were 2 1/2 x 8 1/2 I had considered a braid look but changed my mind and went for a little scrappier look. |
 |
| Thrown on the floor to check for missed seams. Looks good! |
 |
| Side ways picture of top hanging. There is a little wiggle to it But I am sure it will all quilt out--ha ha |
 |
| Love this scrappy border- Thanks again Dawn for thinking of me and sharing your scrappy finds! |


Thursday, July 18, 2013
Another scrappy (stringy) top
I wanted to use up some of the strings I have been
These were paper pieced in sets to triangle papers that I die cut with my GO.

Didn't even make a dent--lol

Tuesday, February 15, 2011
Like a Butterfly......

I too shall awaken in my own time.
I don't know which was more fun, sewing the strips for the tumbler borders, or cutting the left overs for the scrappy words.
Hopefully this top will be one of the ones I quilt this year. I have a new to me butterfly pattern I want to try out.
Wednesday, February 9, 2011
strings and tumblers make a nice scrappy border
 I did not get to sew as much as I had hoped to this evening.
We are getting another snow storm, which for me is an excuse to stay home from work (yeah) but I ended up doing computer stuff all day (darn reports) and missed out on getting to sew more strings together.
Maybe tomorrow night I can get back to this border-
I an sewing sets of strips and then sub-cutting them into the small tumbler die shape.
They take on a scrappy crumb block look.

This die works on my BABY GO. I have ordered the larger die and it should get here tomorrow!
I have a whole new found love of strips and strings knowing that I can now get more use out of them with the new cutting system I ordered.
These blocks take 5 strips each and I am cutting both horizontal and vertical tumblers.

I have one side done and a bunch ready to sew up for the border on the other side. 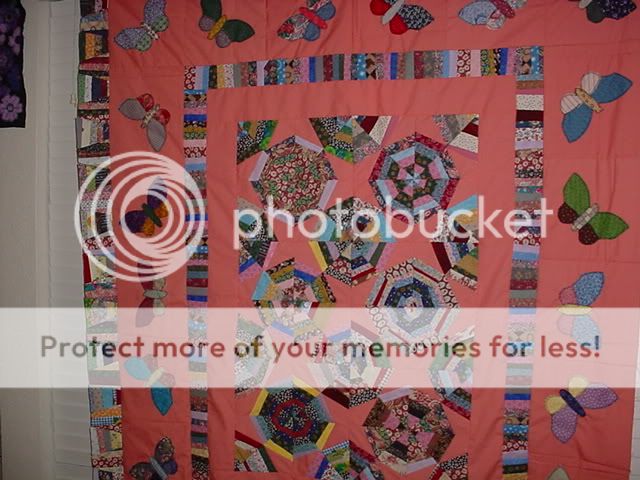
Salmon pink is not my 'color' but I am learning to like it.
This top is growing on me and hopefully will be a bed size quilt sometime in my life time!
I have one side done and a bunch ready to sew up for the border on the other side.
I finally figured out what saying I want to put on the last border.
I have been cutting out scrappy letter to raw edge applique.
Salmon pink is not my 'color' but I am learning to like it.
This top is growing on me and hopefully will be a bed size quilt sometime in my life time!
The outer border will be wonky letters and say:
Like the Butterfly, I too will awaken in my own time.
For some reason I love that saying. Kinda makes me sound profound and sarcastic both at the same time! Wont this be fun to sleep under.- cw
Monday, February 7, 2011
Piano Key, Strings or Crumbs? That is the question...
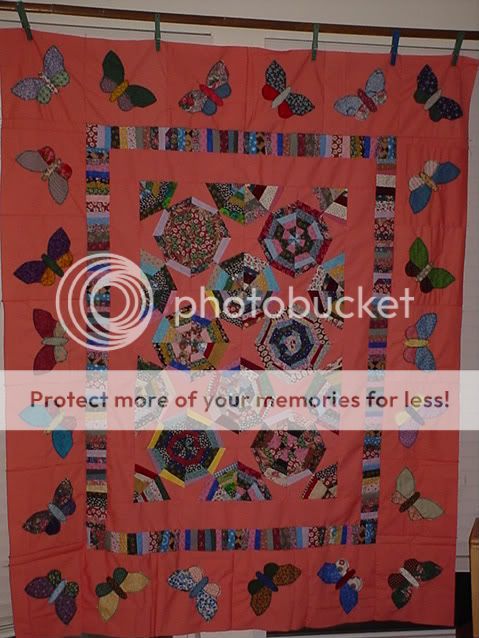
I started this top awhile back. I learned that I am not really a fan of spider web blocks (that's not entirely true, I am a fan just not a fan of doing them myself)
So this center sat for quite a bit.
Last week Mary asked to borrow one of my tops to photograph for a class she is getting ready to teach. This one was in the pile.
I had always intended for it to be a bed size quilt some day. (evidenced by the box of scraps labeled: TO DO)
A border of scrappy butterflies brings the top up to 54 x 63 (ish)
What do you think should be the next borders? 6 inch scrappy Piano Keys, String blocks or Crumbs?
I really thought I wanted to do some wonky letters on the final border but can't decided what I want to piece.
Phrases to consider: Just like the Butterfly, I too will awaken in my own time.
or: The butterfly counts not months but moments and has time enough.
Thursday, January 20, 2011
Yellow Flower

The yellow is all scraps from Alycia. I added the black for background and my own scraps for the letters.
I think I did a good job using up all her small pieces.
The saw tooth border was cut using the smallest triangle die with my BABY GO.
I didn't iron or re-size and most were cut on the bias so there is some distortion. (I like it)
The letters are cut free hand and I will raw-edge applique them.
Judy is doing a color a month challenge and I am considering ideas for making large blocks to add to a quilt.
I had started this scrappy flower block from material and blocks that Dawn gave me.
I have several ideas to make it larger. All involve me pulling more fabric and using my cutter!
Maybe I can work on it tonight and start my FNSI a little early.- be good cw
Thursday, January 13, 2011
BABY GO Tumbler and Flower

I have several mini bins of 1" strings that I was looking to put into a project.
Last night I sewed a set of strips and sub-cut with the Tumbler die. At the time I was auditioning for a scrappy tumbler design.
The horizontal strips reminded me of flower pots.
Then I remembered that Dawn had gifted me a box of yard sale fabric. (When I say 'gifted' I really mean I just took it)
I think there is enough variety of scrappy between her pieces and mine that I can get a fun scrappy quilt.
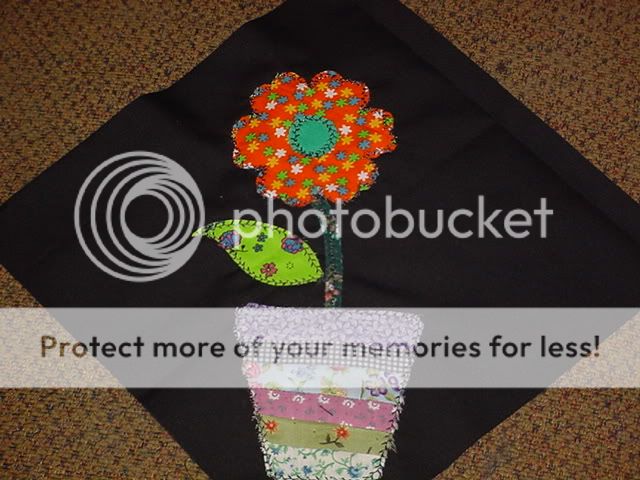 This flower was cut using my BABY GO and the flower die. The flower pot is a tumbler that was pieced and then cut.
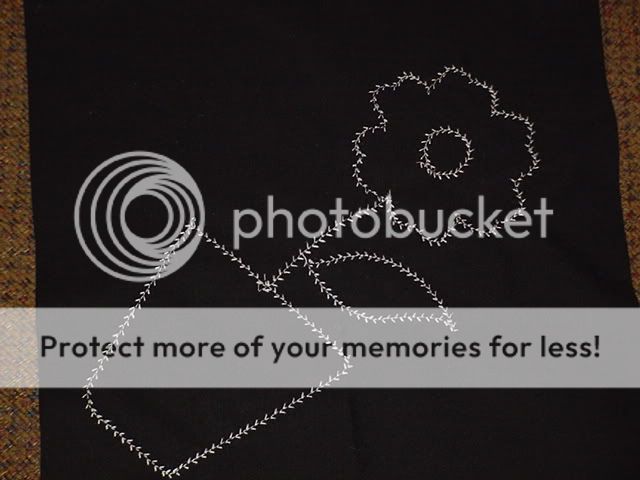
I enjoy doing raw edge applique. Look at the cute primitive thread drawing I get on the back of the block!
Wednesday, August 11, 2010
Mary's show and tell

Quilt group meet last night and we had a little show and tell. Mary M was inspired by the last strip/string class and made this beautiful Christmas prints top.

I just love how she did the borders. This quilt is a Holiday Beauty!
A couple of months ago we used a series of Children's Prints to make donation quilts. One pattern the group tried was the Cut-Up-4-Patch.
Several of the gals have gone on to make additional personal quilts from the pattern.
Here is one that Mary made and Free Motion Quilted.
Another beautiful work of Love.


A little more sewing on the borders and she can start on the binding. Mary is not by nature a scrappy girl but she is enjoying mixing it up a bit. (I am starting to wear her down) I just think her eye for color and precising in assembly just produce the most lovely pieces of work.
I am thrilled to get to share the photos. As friends and quilters we never know when we are going to motivate someone. Mary is definitely motivating me to add both of these to my future TO-DO list!
Sunday, July 18, 2010
YardSale Find- don't look if you are busting stash!
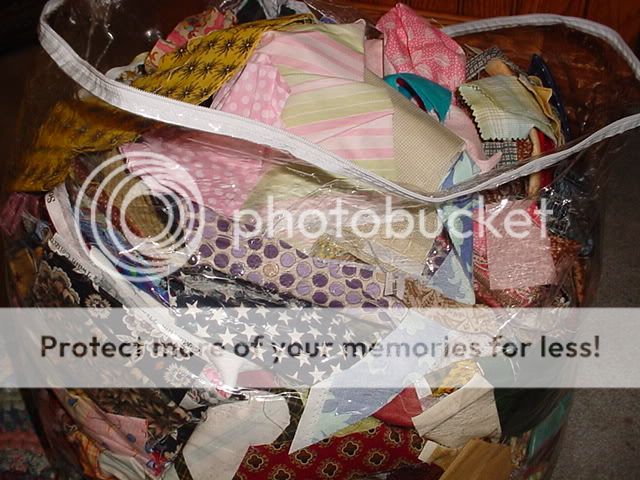
Good friend Pam suggested I run down to one of her favorite shops and check out the 'yard sale' they were having.
Hubby ran down with me. We did a couple of errands, had lunch with my sister and her girls and got to the shop just before they closed!
I love scraps so I spent my time at the $$ per bag table. There were several sizes of bags, I started with a smaller one and quickly realized that it was not going to work.
I love scraps so I spent my time at the $$ per bag table. There were several sizes of bags, I started with a smaller one and quickly realized that it was not going to work.
Since it was so close to closing and the gals knew the bag prices would be 1/2 price the next day, they let me fill a large one for $20.
I weighed it when we got home and .....drum roll...... 26.5 lbs.
It was not even packed full. I started out being selective but then just started putting it in by the handful. I ended up with over 50 of these fat quarters of Christmas labels. (They will be re-gifted as stocking stuffers for the quilters in my group)

I sorted by 'colors'. At first I was looking for lights, so that pile has a lot of cream, yellows, tans etc... it also grew to include browns.
The greens and red were mostly repos and I have enough to do several pieced tops.
My favorite find is all the pre-cut strings and 2 1/2" strips. My head is spinning on what I hope to use them for. Another Benito box top maybe?
Strings are being added my collection and should get worked in to my TO-DO list soon.
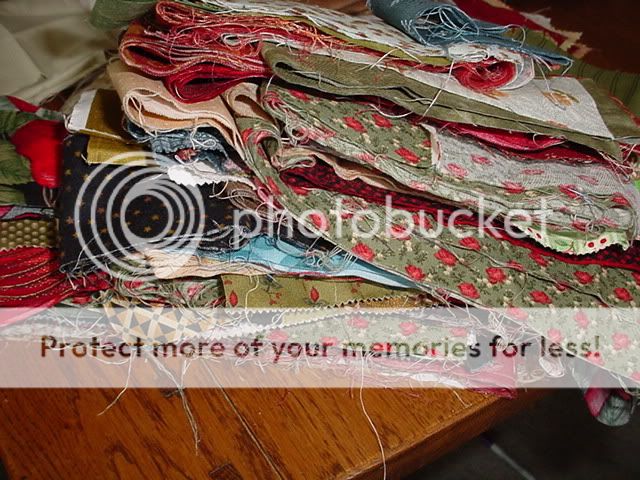
Strings are 1 1/2" irregular, most are Width of Fabric~
Strips are mostly 2 1/2" WOF with a small pile of 3"


The flannels have been sorted out and bagged to mail to cyber-friend Erin.
The homespuns were put aside to gift out but after looking at them I may make another scrappy version of the 7-shirts quilt.
I may also do a separate post on them and figure out a give-a-way.
I have no clue how much fabric I am adding to my 'collection'- I am so glad I don't keep track, bet this not only blows my self-imposed NO BUY but it slows down my stash-busting too!
Wednesday, June 23, 2010
string blocks- quilt group
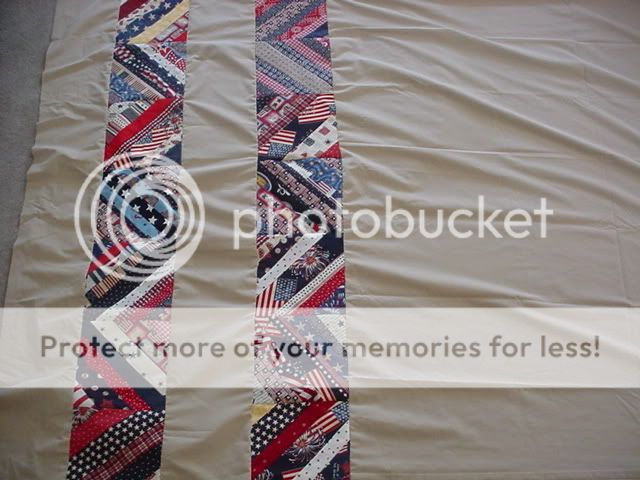 This top is 64 x86 and will be a donation quilt when finished. Made with 8 1/2 practice blocks.
Tonight's class was a follow up on strings. The gals turned in 14, and whipped up another two to make two sets of 8.
String blocks can be pieced on paper or fabric. (you don't have to use a foundation but it really does help keep the block stable)
Strips can be any size, cut straight or not.
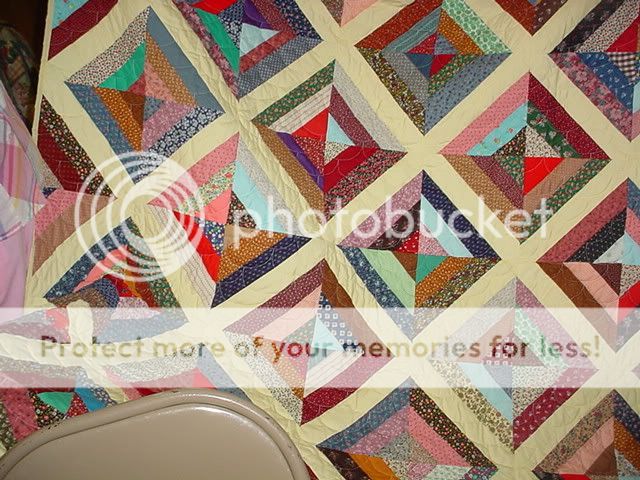
Marge brought a couple of hers to show. I really like how using a solid as the center strip makes this block look more complicated.
After seeing these beautiful utility quilts I could see the ideas just start taking off for some of the newbies.
How cute would this be in kids prints!!

I even heard someone suggest Christmas fabrics. I can't wait to see who makes the first top!
-cw
Tuesday, June 8, 2010
String Block Quilt class June-2010

Whether you choose to piece your strings on paper or fabric, I think you will find this is a fun block to sew to use up your scraps.
Some may prefer foundation blocks cut from old sheets. Other may like newspaper or phonebook pages. I have tied both and lean towards paper (I like the mess it makes when you tear it off!)
If you are sewing to a fabric foundation, use a normal stitch length.
(On a paper foundation, use as short a stitch as you can, it will perforate the paper and make it easier to remove)
Center your first strip face up on the diagonal of your square.
Place your second strip right side facing the center strip. Line up the edges of the fabrics and sew using a 1/4" seam. Press open if you like. I usually just finger press and go on. Continue adding strips until the block is the size you want.
Make your blocks in any combo you like. Try going lights on one half, darks on the other. Or alternate Red White and Blue strips. Whatever you can think up, will look good. Only rule is start in the center on the diagonal.
For this class the challenge is to make at least 2 donation blocks (8 1/2") from the scraps provided. Feel free to mix in your own Red Whites and Blues. We will use the blocks next class to make a small top.
For you own fun, experiment using different size blocks to start with. Piecing with strips can be done on any shape you like, any size you like. Save the pieces you cut off, we will use them in a later project.
String quilts have been a traditional way to use up scraps for many years. Please bring a picture or better yet a favorite string quilt to share next class time.
Thursday, March 18, 2010
SpiderWeb Scrappy
 I have been wanting TO-DO a spiderweb quilt for awhile now. The other day (OK a couple of weeks ago) I started cutting strips.
My thought was I would make strip sets and then cut the triangles and then piece to the background 'kite' shape.

Note to self: Make a pattern and try it out on scraps.
The first couple attempts all ended up being made into potholders!
I finally got a block size I liked. Not too thrilled with the background 'salmon' color. It is just too different from my scrappy stuff. My pinks fade in too much for my taste.
I was going for a rough look, not using same size strips. If I do this again I will most likely use a larger strip to start. Last night I decided I just don't like it enough to finish so I border out the sqs that were done and called it finished.
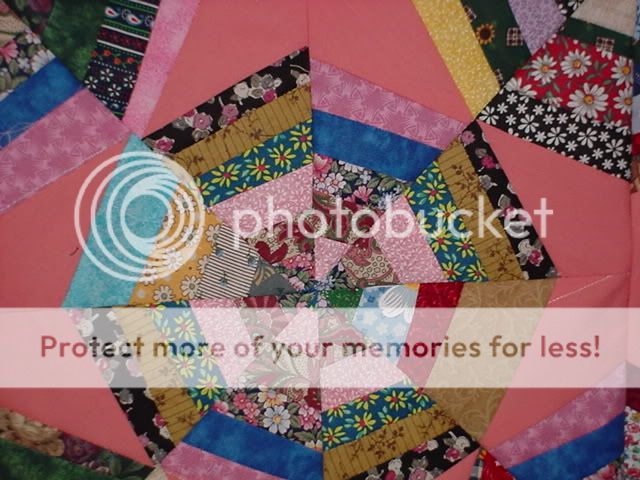
These wedges are harder to keep straight then I thought they would be. Next time I am taking my time and pinning~
After having it hang on the mini-blinds, I am re-considering my dis-like for this piece. I most likely will add another outer border and do some applique- It's never over till it wants to be over.
Wednesday, January 6, 2010
scrappy spiderweb 6 1/2" block
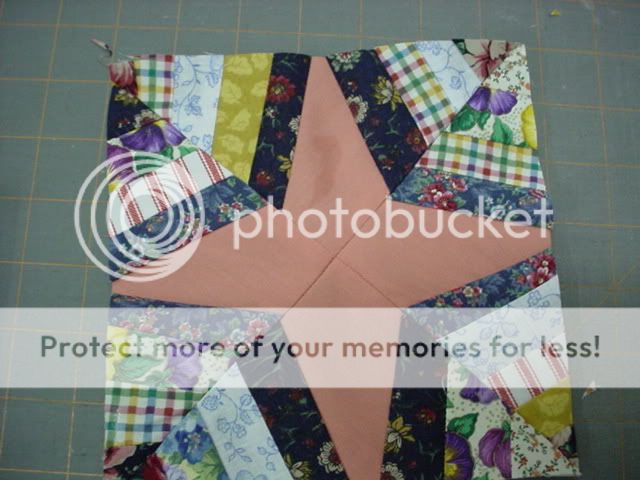 I have been talking like I am going to do a string project. I cut 8" papers from the phone book to start (OK that was several yrs ago). I have made piles of scraps (most get misplaced or used for other projects).
The other day I fell in LOVE with a Diamond string block and decided that was going to be my new TO-DO.--- wrong! (In my defense, I did cut out the diamonds- they just didn't speak to me.)
I remembered seeing a scrappy spiderweb layout a couple of years ago. I played around with the 8" papers and figured out a way to make a 6 1/2" block. This first block is done in the traditional way. Sew one small piece at a time.--- Seriously thought this might be the only block and that it is going to end up a potholder.
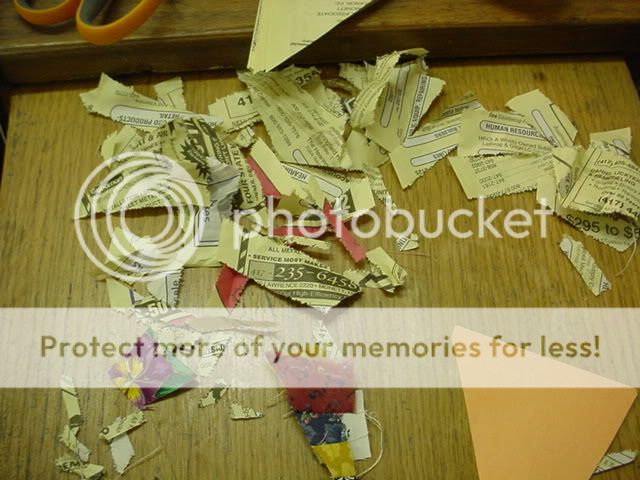 Look at the paper scraps - I can't imagine tearing that much paper on the 120 blocks I want to make. I had to come up with plan "B"
 My 8" phone book pages were cut in quarters on the diagonal. I used a 3" sq. of the solid (base fabric) and made a template so I could cut the kite shape quickly. (there is a little waste but I can live with it)
I then sewed 6 strips of misc sizes together. Most of mine are around 1" (ish)- less than 2"
I ironed the set and used another self made template to rough cut the strip triangles. I decided to sew them on the paper to make sure I was attaching correctly.
 I think I like the possibility of having blocks with matching fabrics in them. In this strip set I got a total of 7 of the smaller triangles. One would need 8 to make a block. These will get set aside and used with other 'orphan' pieces.
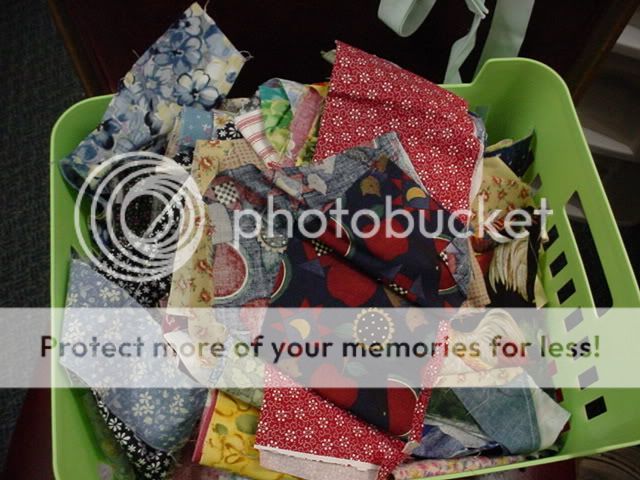 I found a small pile of 2-4" scraps and decided to sub-cut them into strips to use for this project.
The cutting was by sight so hopefully there will be enough to get at least a few matching blocks. I am pretty excited that I got this far. This quilt has a strong chance of actually getting made now that I have figured out how to get the look without all the sewing and flipping.
Tomorrow I will see how many strip sets I can do before my head explodes- I may have just found a New-To-Me fun way to do the string thing.
 This is a lot more variety than it looks. Wish me luck.- cw
Subscribe to:
Posts (Atom)