Wednesday, September 30, 2009

Ready for borders-

pick and choose borders 005 I got the center sewn up this morning and hung it on the mini blinds (my version of a design wall). I decided that this was a lot of sewing for a 50 x 50 ‘top’.

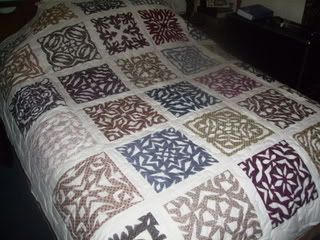
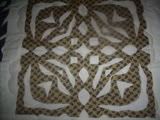
This project is strictly from stash and for the most part from a couple of baggies of inherited sqs. I added a narrow 3” border from a black sheet (Yes it is stash from my buy them on sale days!)

The scrappy border is from sets that were sewn in threes (poss for a 9-patch block?) I made two sets and cut them each in half length wise to add color.

The next border is more of the black and cut at 6”. I was planning to be done at that point. I still had a pretty good hand full of the pre-sewn sqs. so I joined a few more and added the larger 3” scrappy border.

pick and choose borders 003

This top decided it just was big enough to let me stop thinking about it. I have enough of the black to add another 9” border all around. So instead of a 72 x 72 I am shooting for a 90 x 90. I can live with that.

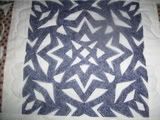
I know you are thinking that with such large open areas in the borders that I am going to quilt really lovely stuff- wrong!

I am a border to border gal- so I have to keep it simple. The borders do concern me thought. Here is what I am thinking now- tomorrow may be something different.

pick and choose borders 006

First thought is to do something in the top left and bottom right corners- Then add the larger border and ‘do something’ on the opposite corners. Question is “WHAT”?

pick and choose borders 007

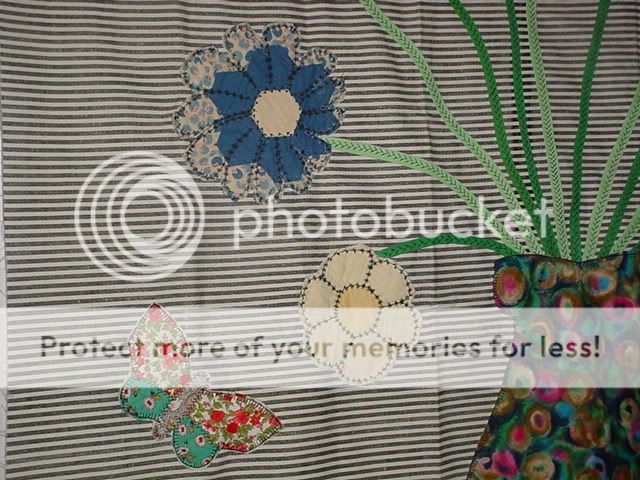
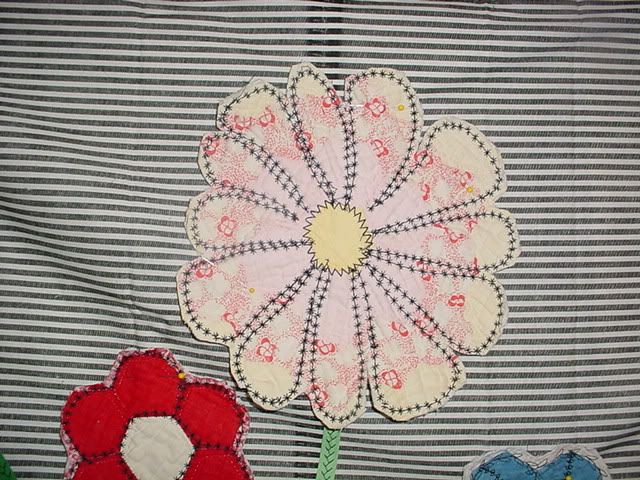
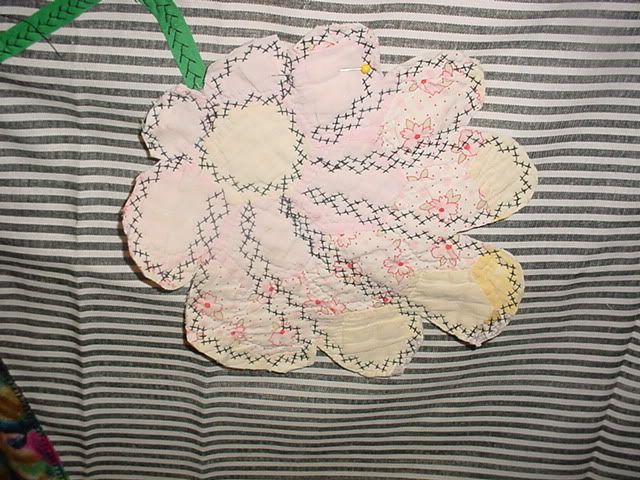
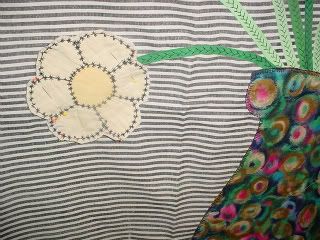
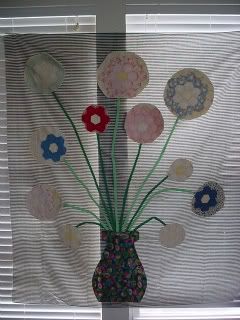
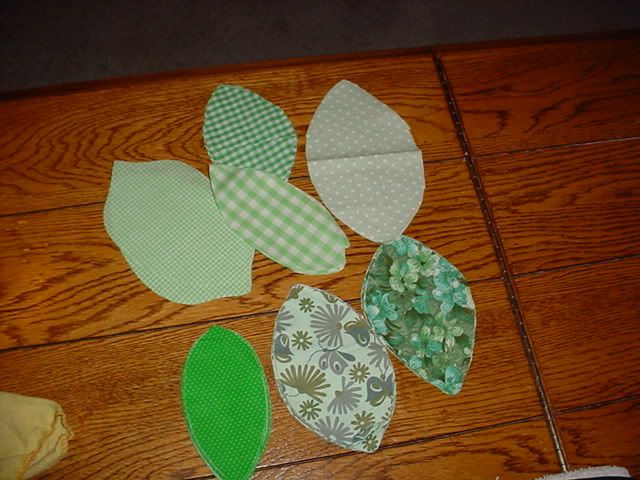
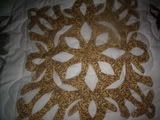
I am not liking how my leaves are turning out so IF I can get away with not using any, that will be fine with me.

pick and choose borders 008

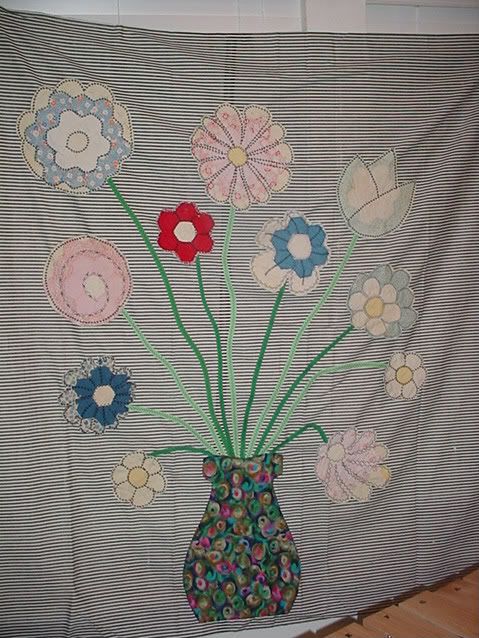
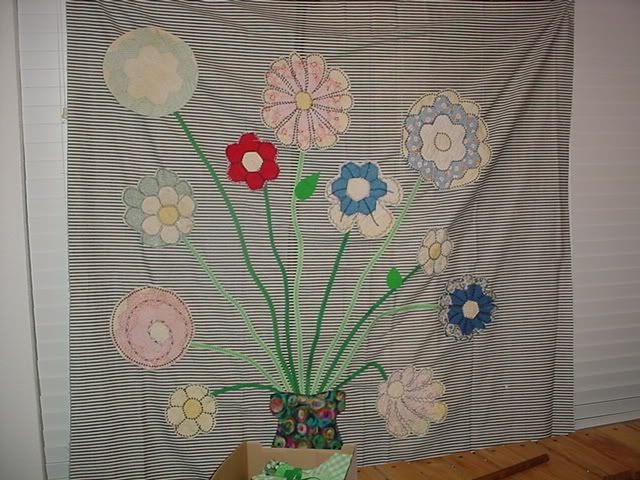
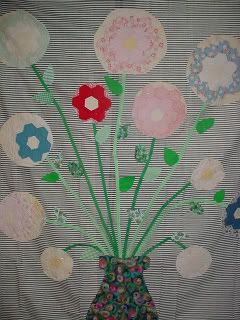
Now that I ‘see’ this last photo I am wondering if it would look OK to just add ‘circles’ in place of the flowers- That would be easier than appliquéing the petals. (and I wouldn’t have to consider leaves).

I may just wake up tomorrow and decided this is finished the way it is.

Now to come up with a NAME for this ONE.- cw

Tuesday, September 29, 2009

Less Picking more Choosing- almost there

I have my 25 large blocks (10 1/2") sewn and several sewn into rows.
Question IS-- Do I set them 5 x 5 and add a black border and some applique OR.....


Set them on point with black setting triangles and do a little applique?


Either way I am leaning towards a black border of some kind. I can see me doing a vine with flowers or butterflies (or both!)

More from the 08 Mystery

mystery 001I am missing a lot of photos that I thought I had saved but who knows where. Hopefully Nancy saved the Mystery and we can link to it for reference.

If I have time and she gives me permission, I will try scan the original directions and post a link. This was a fun project and we got such different results!

Mary M.ladiesnight2008032

ladiesnight2008015 Sueladiesnight2Pat S.

MINE! th_quiltmystery08002 th_quiltmystery08001 I decided I would rather have a couple of smaller tops and split this into two lap size. Still not quilted- surprised? NOT!ladiesnight2008014 Sue IIladiesnight2008017 Deb Hladiesnight2008031 Kelly W

Monday, September 28, 2009

Edna finished her Mystery Top

Hey Nancy Rose do you remember this one?

Several of us followed along on your other blog in 2008 to make our own versions of the “Mystery” you offered.mystery 002

I remember our group displayed our quilt/tops at our Ladies Night in Sept of 08. Last Tuesday when the group got together our at my place, Edna asked if I remembered this project. I had not seen her blocks put together so I was very excited to get to see the center was done.

She added the border and checkerboard and it is ready to stand in line to be quilted.

I never would have thought that this is the same pattern that we did the mystery. What a lovely quilt top!

mystery 001

As usual I hang them on the mini-blinds to take my photos- the yellow fabric is for the back- I can’t hardly wait to get started!!

Almost to Scrappy even for me-

When I was gifted this “quilt top” the 24 blocks were sewn  4 x 6- I put it aside b/c it was so puckered there was no good way to quilt it.  I considered just tying it but because of block construction that wasn’t going to work.

My best guess is that the original quilter started to piece the blocks from scraps that were handed down to her.  The hand stitches show several skill levels.  Quilter number two attempted to finish some blocks before deciding she didn’t “hand” sew.  Hate to be the one to tell her that she doesn’t “machine” sew either.

My plan was to take the top down to just blocks and re-size (square up) and re-set.  Plan B was going to be just use the blocks as examples of ‘what NOT to do’ when sewing.  Plan C was to just throw it all away.  After getting it down to block size it was obvious that re-sizing wasn’t the answer.sept 09 006sept 09 005

The blocks were un-stitched and/or cut back into the 9 pieces that made up the block.  In this case 9-patches and setting strips that I was able to press flat enough to re-size and then re-sew the blocks in a smaller size.  What started  as a 12” block ended up at 10” sept 09 025sept 09 024

Four of the blocks were just in too bad of shape to mess with.  The top looks like it was made by a gal smoking crack BUT it does lay flat and will be able to be quilted!  Yeah another utility quilt for taking to the park.

 sept 09 023

This one kinda grew on me as I worked on it.  I always say there is no such thing as an ugly quilt.  I may have to re-think my philosophy!

I am considering a border of butterflies to help enlarge this piece- don’t hold your breath- I have already spent more time then I wanted too on it.  At least I didn’t throw it away.  (Bet that mean’s it will turn into a family favorite!

I can see myself doing this pattern in scraps and solids and strip piecing it in a larger block.  I think an 18” block would give me room to appliqué in the center sqs.  I’ll post a link if I get around to it.  cw

Thursday, September 17, 2009

future Wedding Quilt


Our oldest daughter 'likes' greens. The quilt started out as a wall hanging. The center medallion was inspired by an add in a mag.
I had left over tulips and substituted them for the flower (yes I know that tulips don't grow on vines!)
I left the center hanging on the mini-blinds for a few days while I figured what I wanted to "do" with it.
I had seen someones top with a 9-patch border and that looked 'good to me'. Threw on the inner border and hung it back up.
For some reason it 'looked' unfinished. I had not tried doing an applique strip before (I tend to do blocks so even this center was a stretch) so it seemed like a good chance to try something new to me.
Now I liked the ease at which the borders went together (good thing I am a fan of raw-edge applique) but the top still looked like it needed something else. Checkerboard border and call it DONE, if for no other reason then the size!
I looked all over for a picture of this project but it much have been done before I went digital b/c I don't have any except for this one when we displayed it an a Ladies Night last year.
The quilt is safely tucked away until DD decides on a man that can put up with her- cw

Wednesday, September 16, 2009

2 cents part II FLOWER quilt top

Here is the link to part one.
I had too many pictures to share to keep adding them all to the original post.


I am just LOVING how this top is coming along.
When the girls and I first started this was supposed to be a utility quilt to take to the park.
It will still get to go to the park but first it is going on a bed.
I have a couple of border ideas in my head and need to jot them down before I forget what I am thinking!


Here the flowers are sewn on and I pinned on the butterflies to audition them, they passes with flying colors!

These flowers were from a cutter quilt that I picked up for $5.00 at the thrift show. I guess the first person to cut on it thought they had used all the good parts-- wrong--I finished it off by cutting 'plates' to use to patch my sisters old quilt- you can see that story here.


Here are a couple of close ups to show off how the applique is playing with each other.
I figured out that it was easier to embellish the flower before I sewed it to the top.
This is fun finding the flower from the 'plate' shape. These flowers are all ones that didn't make it into Theresa's quilt.
The background is a ticking material and has 'flaws' . Originally I was just going to sew the plates or "bubbles" on the background and make a Utility Quilt for the car. It was pinned to the mini- blinds so I could see the areas that needed covered up when the girls came over to play.


I told the kids that I was thinking of making the bubbles into flowers if I could figure out what to put them in.
A vase seemed to be the easiest to attempt.


The flowers evolved on their own. You know how gals say their quilt talks to them. This one woke me up last night!
I had one plate left to figure out (the light blue one on the right) I swear around 2 am I started dreaming of Tulips! How funny is that?
This morning when I got the grandson off to school, I snuck in a little sewing time and whipped out the tulip flower.


These were made from my stash of feed sack scraps.
I appliqued the butterfly to scraps of the cutter quilt and then cut the patch out and sewed it to the quilt top. Way easier then trying to applique directly to the background!


Thought I would share what I decided to do with the leaves. Seeing as the rest of the top has a little dimension to it, I decided the leaves need a pop too.
I am running out of scraps so I called good friend Linda and stole back the bag of scraps I gave her.
When I gift to friends, they know there are strings attached- pun intended-- I always get dibs if they haven't use it by the time I miss it.
Good thing Linda is slower at projects than I am b/c now I am getting enough to get my leaves 3D


I started doing the leaves in several fabrics until I ran out of quilt scraps to applique them too.
When I took the top to show off tonight after church, we decided to just use the green Swiss print for all the leaves.
It is on my list for tomorrow to get the bag of cutter scraps back from Linda and to make a bunch of green Swiss leaves.
I had given her the scraps after cutting for Theresa's quilt b/c I "would never need them". famous last words.
I will post part III when I get the leaves on and figure out the borders. I am giving myself a dead-line on this top b/c it was not on the list (not that I stick to lists). I have serveral other tops that are higher priority. (yeah right) This is just too much fun to put down!- good night


Sunday, September 13, 2009

I need your TWO CENTS Plz--


Wed. update-got the last of the flowers pinned up. Now need to decide if I like the lay out and then applique to the back ground. Hope to work on this after church tonight and start adding leaves tomorrow. (I sew early AM or later PM) I of course post when ever I can get to the computer!!- cw


I hope this project will be short and sweet, Start at the bottom of this post to see the progress!

Tuesday evening update-
this project was started on Sunday when a couple of girls from church came home with me to 'help clean'. Pre-teens are just the best!- This is our version of 'cleaning'.

Today I played with a few more of the flowers, these are so much fun- I love decorative stitches!!


These flowers took on a life of their own. I still need to applique to the back-ground and add leaves. This is going pretty fast!


MONDAY:


Yeah, I got about an hour to sew this evening. Appliqued the vase and stems to my background fabric. Realized I can play with the flowers before I sew them down.


Decided on a size for the leaves, now just need to pick multi fabrics or just the 'green' one. I love the Swiss so I may go with it. Either way I have enough leaves cut out.


There are more on the floor-lol


Here's today's edit- I think I am going to applique down what I have and worry about leaves later. One suggestion was a narrow leaf and I am liking that idea. I took out a flower to make it an odd number. Think I can add one of my butterflies to the space on the right.

On paper it looks like I can applique the flowers to have a little more petal detail. I am not much on art quilts but like to play every now and then when doing one for fun.

56" x 56"


Love this fabric that I used in the vase!


The "flowers" are left over from my sisters fix-er-up-er. (Plates from a cutter quilt top)


The stripe back-ground is a flawed piece. The vase is a couple inches off center to hide a blob.

I need HELP figuring out the flower stems- (after seeing the picture I am thinking I want to give each flower it's own stem)


I plan to add leaves but haven't decided if I am going to do them before or after I quilt the top. (I might sandwich the leaf with batting and go for a 3-D look)


I am planning to raw edge applique I just need little help with the final placement.

I did print a black and white pg and am going to practice drawing the stems to see if I can come up with something I like better.

The 'stems' are bias binding that I had from other projects.


These are some of the fabrics for the leaves. They are too large so I am looking for ideas on a 'shape' to aim for.


Any and all ideas are welcome.
This project is on hold till tomorrow night, so feel free to jump and and think for me.


be good cw


Saturday, September 12, 2009

Pierce City MO Quilt Show- 2009

Not sure how to add the photobucket slide show, so I am going to just link it.
'> ENJOY

Saturday, September 5, 2009

Snowflake blocks

These were cut snowflake style out of 12 1/2" sqs of fabric. For most of them I did NOT use a template. Just fold and cut and be surprised.

Raw edge machine zig-zag to applique on a cream colored sheet (12 1/2" sqs.) and set with a setting strip.

Quilted border to border.

I remember I made several quilts with this 'family' of fabrics but don't think I have any left in my collection. Most have been given as gifts.