I have been meaning to do a little 'butterfly' tutorial for the folks who requested packets of these little beauties. The give-away went pretty well. Everything got mailed out (only a couple of days late) and I have heard back from most that they have received their new TO-DO scrappy project.
I am very excited to 'see' what becomes of my former UFO's
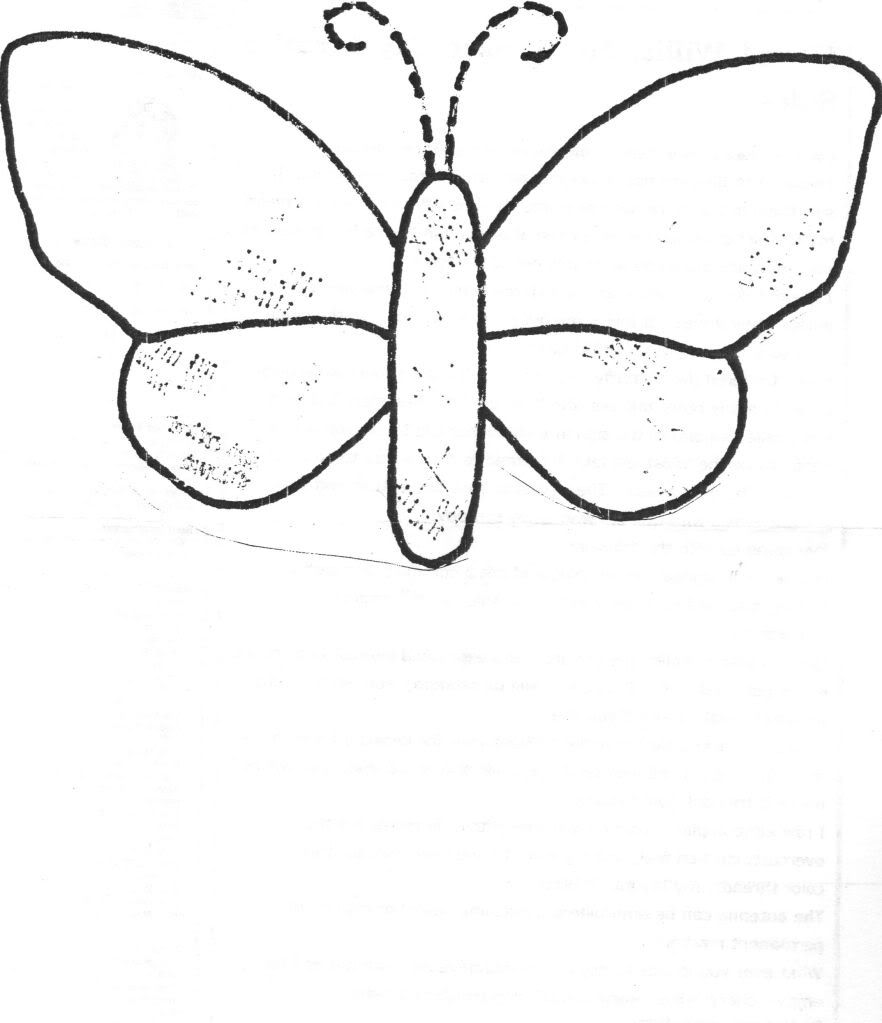
Step 1: Place your 8 1/2 (or larger) background fabric on the paper pattern I sent you. I like a diagional setting- but do as you like. I lay out my wings and tack to the background fabric with a glue stick. The machine stitching will keep it secured, you just want the glue to hold it in place. (rain drops NOT puddles w/the glue)
Step 2: Use whatever stitches you like. These were intended for raw-edge applique. I have seen then finished by hand, colored threads, indivisible thread, overcast stitch, zig-zag, chicken track, and various others. The only one I am not a fan of is satin stitch b/c the pieces are small.
I prefer an overcaste stitch on the outer wings. (this example is a little small for me, but I f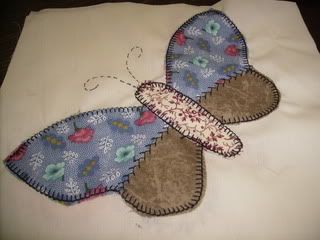 orgot to set my stitch length. -my bad)
I like to do a chicken-tracks or a zig-zag down the middle of the wings to secure both sides.
Step 3: Do the Antennae in either embroidery, machine stitch, or my favorite permanent marker!
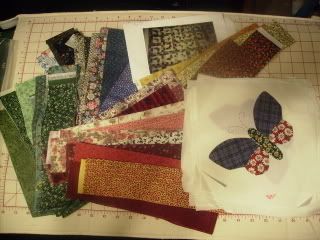
These can be set in numerous ways. (again with the scrappy) I like a 2 1/2" sq and tend to use them in strip sets a lot. (That's why I use an 8 1/2" background)
I am very excited to 'see' what becomes of my former UFO's
Step 1: Place your 8 1/2 (or larger) background fabric on the paper pattern I sent you. I like a diagional setting- but do as you like. I lay out my wings and tack to the background fabric with a glue stick. The machine stitching will keep it secured, you just want the glue to hold it in place. (rain drops NOT puddles w/the glue)
Step 2: Use whatever stitches you like. These were intended for raw-edge applique. I have seen then finished by hand, colored threads, indivisible thread, overcast stitch, zig-zag, chicken track, and various others. The only one I am not a fan of is satin stitch b/c the pieces are small.
I prefer an overcaste stitch on the outer wings. (this example is a little small for me, but I f
orgot to set my stitch length. -my bad)I like to do a chicken-tracks or a zig-zag down the middle of the wings to secure both sides.
Step 3: Do the Antennae in either embroidery, machine stitch, or my favorite permanent marker!
These can be set in numerous ways. (again with the scrappy) I like a 2 1/2" sq and tend to use them in strip sets a lot. (That's why I use an 8 1/2" background)
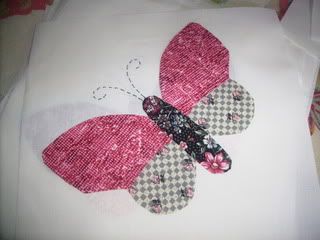
I sometimes like to use a solid fabric in the lower wings and body.
Still scrappy but a little more controlled.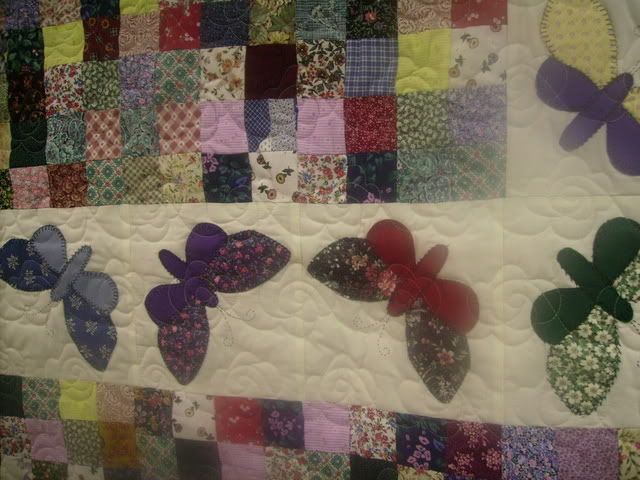
Finish your piece in the style of your choice and when you get time, share a picture.
I seem to like to quilt flowers on my butterfly quilts.
Many THANKS to all who took a set to work on, I hope to see many, many butterfly projects finished this year!
be good cw