Thursday, December 31, 2009

New Year's Resolves.....maybe, maybe not


I did something today that I didn't think I would have it in me to do. Not only did I stay on task and finish a TOP, but I then cleaned up my sewing mess and turn off the lights before I left the room.
You would have to know me to know what a HUGE improvement this is on my 'style' of existing.

I have been working for a couple of years "organizing' my sewing/quilting life. I make great strides and then backslide twice as far as I have advanced.

The other day I had hubby bring home a large folding table from the church building and set it up in our den. I then threw everything that wasn't nailed down into piles and moved it ALL in to be sorted. Took a couple of days BUT I finally feel like I know where things are. Instead of having a pile of scraps and a ruler and misc in one box and similar items in another, it is now all where I want it to be. Not bragging or complaining, just reporting the facts.


I inherited an old desk from my father in law. It took some moving around but I have it in the sewing room. It is officially now my cutting area, design station, and spot for the grands to sit and color while I am sewing.
To the right of grandpa's desk is my sewing station, this is a favorite desk given by a friend years ago. It was painted grey and I stripped it and did an oak stain. Wish I had that energy to restore now. I am just going to go with a shabby shabby look.
My third center is a small piece I bought from a client who was moving and didn't have room to take it with them. I keep my 'fancy stitch' machine on it and do most of my raw-edge applique here.
Not pictured is my newest station. An old singer in a wood cabinet has my embroidery machine setting on it. I haven't actually use it since re-organizing BUT I do know where my thread and the books are for it. (This is a big improvement)
Not picture is the closet of finished quilts that was cleaned and refilled. Most of these are future gifts for relatives (OK I mean the grand kids) I also have a library area (An old bookcase on top of a small dresser).
There are a lot of posts going up today about resolutions for the new year. I am not to the point of admitting I have any BUT if I did, one would be to continue to enjoy quilting AND start doing a little 'clean as I go' . I can't believe I got so much stuff in such a small room, better yet, I know what and where most of it is.
Have a wonderful end of 2009- May 2010 have double the good stuff and 1/2 the not so good.- cheryl


Wednesday, December 30, 2009

No Brainer Sewing- Ya right! Flip A Coin


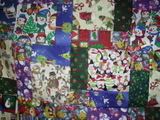
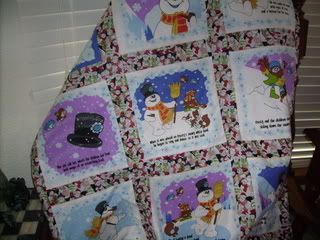
Top is finished and I flipped to see what back to use, I am going with a mustard yellow!
I edited in these first two pictures to show the top and the stage where I added the inner border.
To read the story behind this strange looking top.....scroll down--- cw

I am not sure what I am going to name this quilt. It may not even make it to the 'quilt' stage.

Earlier this year I made a couple of large quilts for a friend. I kept the scraps and added Reds and Golds to my string pile.

I got so far as to cut 8" phone book pgs and tacked a 'red' to each on the diagonal.

Then it sat, (mocking me, I might add) for many months. I just never seemed to be in the mood to sew strings.

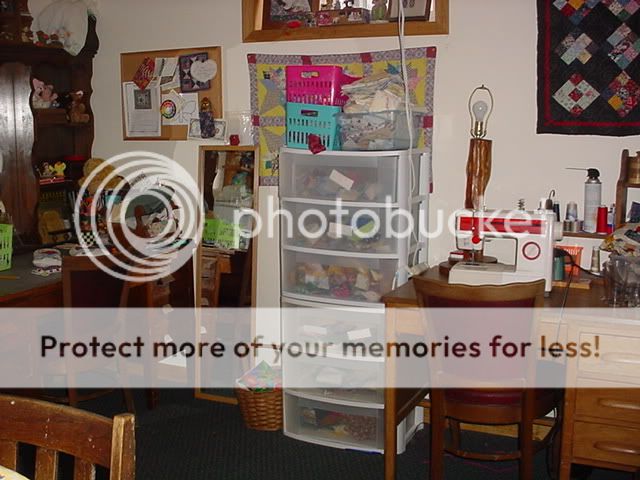
In my defense, I have been working pretty hard and I have been using my 'sewing time' to organize the sewing rooms. (I think I have using this excuse for a couple of years now.)

Anyway, one of my cyber quilting friends tried to gently nudge me into committing to 'string for awhile'. There are groups that are doing A-String-Block-A-Day for a month. For some reason, I just wasn't happy with the red fabrics I had for the center starting piece. (Traditionally the starter is a solid to make an alternate design when assembled).

One bit of advice my buddy gave was that 'strings' are such a great mindless sew.

That I pondered. I like to mindless sew, probably as much or more than the next gal.

That phrase was going to be my marching orders to start on the String Blocks.

Wrong again-----I did make a couple of trys by adding a gold to a dozen or so blocks. While doing so I got to thinking that if this was going to be mindless, I might as well have a little fun with it.

I started a new to me game, called "Flip a Coin" . Rules are simple, Once I start something, I have to finish (for this project only- future projects can still become UFO's at any time)
Once I complete a step, I then decided on a next step and flip a coin, HEADS I do what I was thinking, TAILS I think up something else.

I wish I had taken pictures as I went along (One does need to document madness, just in case) I didn't get a picture of the quarter but you can take my word for it. I am excited to show off the short version of how this process worked.

After sewing gold scraps to the red centers- I asked myself if I wanted to continue- the coin flip was "tales"- that quickly ended my string block project. With one "NO" and dozens of strips sew together, I thought I could make 4-patches and the flip confirmed. I took the paper off, folded the strips in half and eye ball cut each into 3 sections. I then sewed a total of 64 sets of red/gold.

I flipped to see if I should re-size- answer was NO
I wondered if I wanted to use these as centers for a scrappy log cabin- NO
Just b/c a process is mindless doesn't mean that one isn't thinking of other things. I considered the concept of adding borders to make the blocks larger- YES
I wanted to use black- NO
RED- NO
Green?- YES (One would think that I could just pick what I wanted, but where is the fun in that? Besides the green is dark enough that it serves as a black.)
I don't remember all the NO's but the YESes ended up letting me re-size the bordered blocks to 6 1/2" And set them together with out sashing (I was hoping for red sash with yellow setting sqs- that one was a NO)

Here I have a 1/4 of the top pieced and sewn, I haven't flipped yet to see if I get to iron it (lol)


Technically I need to finish setting the center before I proceed but I have a hard time staying on task.

The next couple of "heads" were choosing golds/yellows for the inner border, Green for the middle border (OK I had to throw that one a couple of times!)


I sewed the golds together in random widths, all came from the string bin. A couple were over 4" wide and probably shouldn't have been there but, I was glad to get to use them. I hope to get a 3 1/2" scrappy border. (I wanted 2 " and was told NO)


These need pressed, trimmed and attached. Hopefully in that order. As you might have guessed I am slowing down on the coin toss for every decision.


After I got the golds lined up, and confirmed that green was going next, I considered doing a scrappy reds for the outer border- NO- what? Do that again--NO (stupid quarter!)

Can I use a print? YES


Funny thing is I have always wanted to use this material in a quilt and just haven't had the right one. It matches perfect. It has reds, golds, and greens. I also have enough to do a 6 1/2" outer border.

I have a couple of things I have to do tomorrow but when I get home, I am locking myself in the sewing room and finishing this top.

I am thinking I only have a short couple of hours of mindless sewing left.

This was a lot of fun. Next time I need some no-brainer sewing, I am going to use the Magic 8 Ball!


Before you get concerned and call the men in the white suits to get a room ready for me, just know that I have had a blast. I used scraps, everything was pulled from stash. I have a stupid story to tell.


AND...... no one is ever going to copy this one!

Monday, December 28, 2009

Christmas Quilts

I was looking for a particular photo and couldn't find it. Instead I think I will show off a few of my favorite tops/quilts made with Christmas fabrics.

The first one is a Disappearing Nine Patch made for favorite daughter in law, Kelly. It is happy and scrappy and she has it out on the couch. Kelly loves purples and if I had fabrics to make another I would keep the purple in the larger sqs.


I had to have my own Bargello, this one is still just a top. I keep thinking I am going to quilt it for our bed but don't seem to get around to it.
This Holiday trade (12" Exchange Blocks) is now at home with hubby's sister. She was in the hospital earlier this month and I wanted to take her something to cheer up the room.


Raw edge applique and a 9-patch setting block made for an easy top to have on hand for the next Christmas baby gift.
I love to see the Sue's in Holiday fabrics. This is a fast, easy pattern. The setting strips are flying geese made form the 4 out of sqs. method.


I am always a fan of using the quiet book panels to make baby quilts. This is an easy setting methods, it looks good with or without setting sqs..


I could make Dresden plates forever. Especially out of scraps. This block is in the exchange quilt but I have made many quilt tops just using this block, it also looks good with setting strips.


Christmas Quilt- eye candy--


I wanted to post a picture of this quilt last week. I looked all over in my photobucket for photo. I was getting pretty flusterated when my daughter reminded me that I still have it in my collection. Duh....!
Raelynn is holding it up and one of the grandkids is playing peep a boo behind it.

The applique dolls are pieces originally used as orniments, I used double sided iron-on to add them to a cream block. Then I used crochet thread to embellish each one.

I like puzzles and this top was made using 16 tri/sqs per block. Each green block has a red mate. Some of the blocks are reverse images of each other. The kids like to lay it out and 'find' the pairs.

I don't know why it didn't get brought out this season, I just assumed I had given it away. I keep these for December births or Weddings and use them in my home until gifted.


I hope your Holidays were Merry and Bright!= CW


Christmas Ornaments- TO DO

Here is a quick and easy way to use up those pre-printed holiday ornaments.

For some reason I seem to collect projects that no one else wants to finish. These pieces have to be from the late 1970's!

I picked up two panels from our Thrift Shop for $0.25.


My first thought was to raw-edge applique to solid blocks and use in a scrappy quilt. The colors are a little dated even for my stash so that idea didn't go very far.

Second thought was to do the traditional two sided-stuffed with fiber fill ornament for the tree- didn't take me two minutes to figure out I was not going to do that one either!


I want fast and easy- money/candy holders are the simplest things I know how to do.

One doesn't have to fussy cut or even sew a straight line. For these little give-a-ways, I used two pieces of felt on the back. I cut the outer felt in half to form a pocket.

Machine zig-zag around the entire figure. Add a ribbon to hang. "Stuff" with the candy/chocolate/coins or bills of your choice.


I can see using these as gift tags too. To make a stiffer piece, use pelon and two layers of felt. I can see machine embelishing the piece before adding the pocket.
I am not a 'card' maker but bet these would applique up pretty cute.

Wednesday, December 2, 2009

Favorites Things Block Exchange 2009 Trans-Quilty Group

exchange blocks 2009 transquilty 003 Today a couple of friends came over and we worked on the exchange blocks form a group trade. I had a couple of ideas on how I wanted to set the 10 blocks. This photo is the top sewn together and I am going to share the thought process

(I call this a WHAT WERE YOU THINGING TUTORIAL)

I like scrappy quilts especially when the blocks are different patterns, I have made a lot of Orphan Block quilts from the ones that just quite didn’t make it into a project.

I think it will be fun to see with the other nine gals do to set their ten blocks together.

One of my thoughts was to do a traditional 3 x 3 block setting with strip sets between the blocks and then using ‘my block’ on the back. This would have been a fast way to make a small couch throw size quilt.

Another thought was to make ten split blocks (light/dark) and set the 20 blocks 4 X 5 to make a larger utility size piece. With borders 68 x 80 (ish)

My Idea was to go with a black tone on tone and a pink print. My friend Mary on the other hand wanted a burgundy quilt. I let her pick from stash and ‘surprise me’. I am thrilled with her choices. This setting was easy to do--especially b/c she cut out the sqs. for the blocks and re-sized for me.

.exchange blocks 2009 transquilty 002

Another good friend, Dawn, did my sewing. She is fast, fast and keep the units going as we then cut and sub-cut, etc.

exchange blocks 2009 transquilty 004 Log Cabin Block by Maureen and Homespun block by Reginaexchange blocks 2009 transquilty 005

I made the applique butterfly block and used my extra black in the border to the top. I wonder if the other participants will use their scraps in setting their masterpieces.

exchange blocks 2009 transquilty 006 exchange blocks 2009 transquilty 007 The floral 9-patch block is from Ephi

exchange blocks 2009 transquilty 008Paper pieced star is from Gina, and the Thimble is from Shellie exchange blocks 2009 transquilty 009Zarina made the Shoo Fly exchange blocks 2009 transquilty 010 Sharon did the RED block (a 4-patch/9-patch)exchange blocks 2009 transquilty 011This Friendship Star is from Nancy exchange blocks 2009 transquilty 012 The Ohio Star in Novely print is from Jillexchange blocks 2009 transquilty 013 exchange blocks 2009 transquilty 014

I am thrilled with Mary’s choice for the border material, to keep from having to miter the corners a 4-patch of the burgundy and yellow was a quick to-doexchange blocks 2009 transquilty 015

I will edit in the info on who made which block and hopefully link to each quilters blog post when they finish their tops. This was a fun project- Thanks to cyber-quilt friends and live body friends this top is on its way to getting quilted! cw