Friday, July 31, 2009

Restoration, Cutter Quilts, Pizza--This one's you, SIS!

As a Disclaimer: I do NOT do restoration- I only sew for family and/or friends.

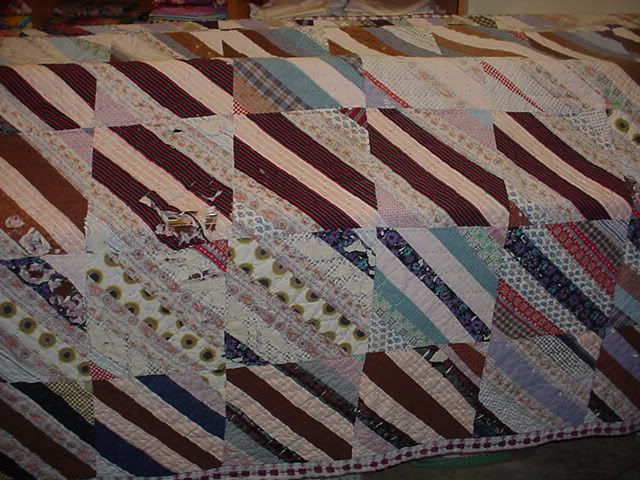
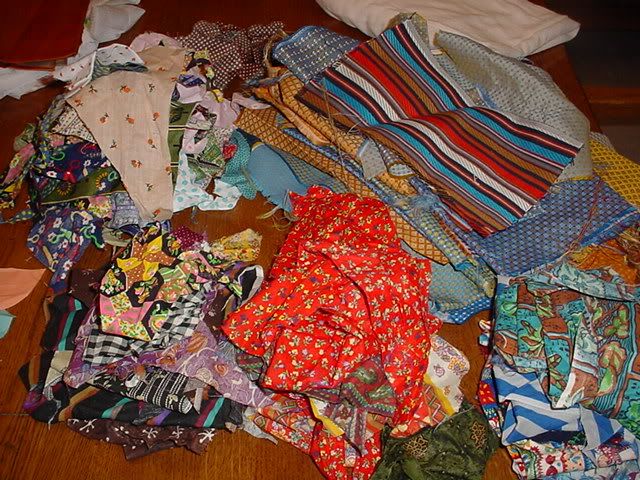
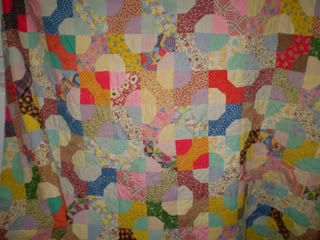
This is a favorite old quilt of my younger sisters. She asked if I could 'fix it' so that it keeps the 'feel' that she loves. The 'look' could be left up to me.


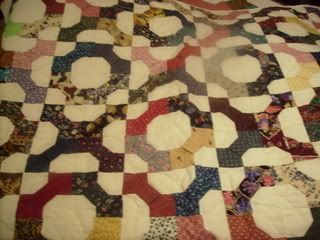
There are about a dozen holes completely through the quilt that need attention.

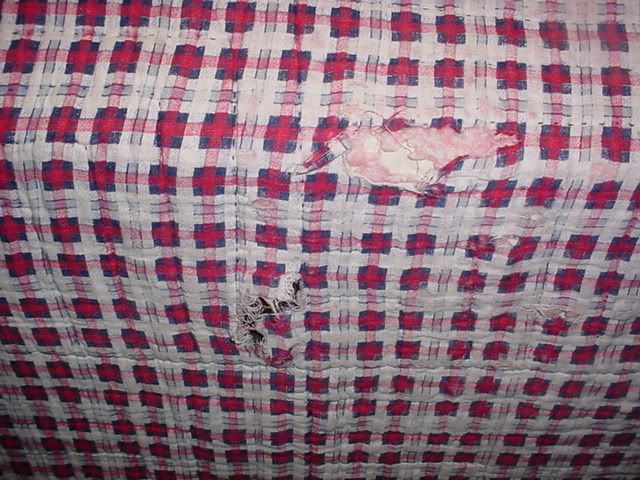
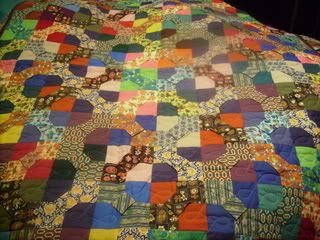
Truth is the back is shot BUT I want to save it as a quilt not as a toy or pillow etc...

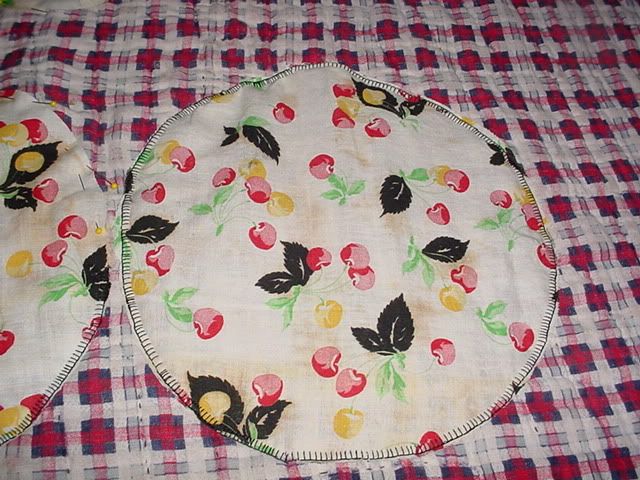
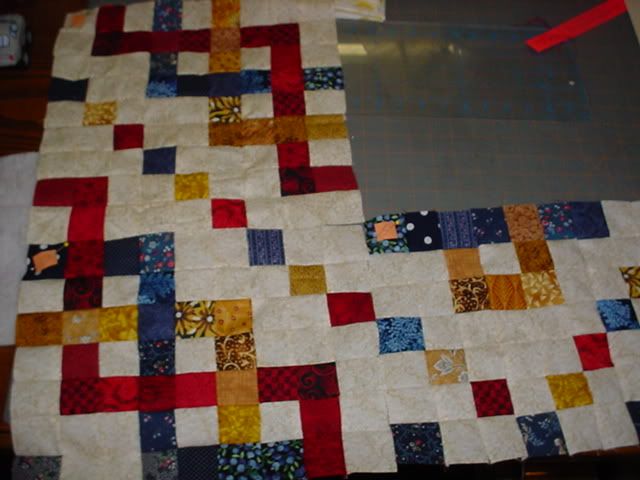
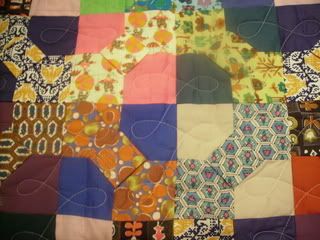
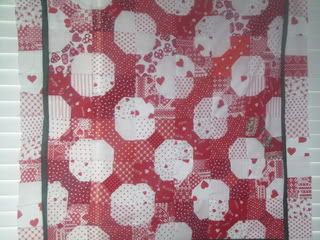
My solution is to machine applique the back first. I had an old feed sack in the perfect colors. My thought is that once the back is stable I can work on the front. I am liking how the circles look like 'pizzas'!


I am sure that when I get finished that this piece will have many more years of being a cherished take to the lake quilt.


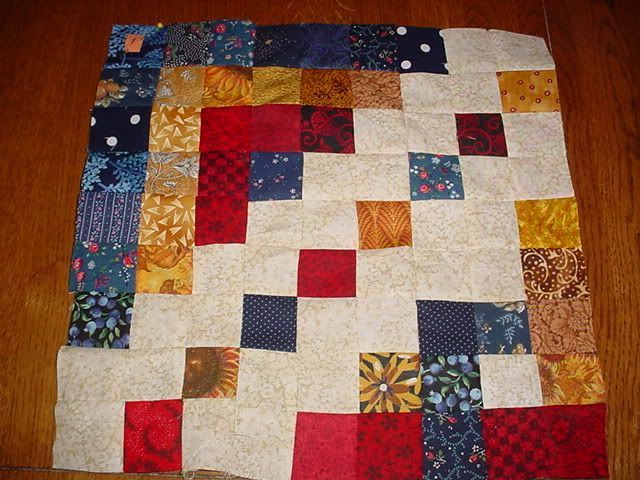
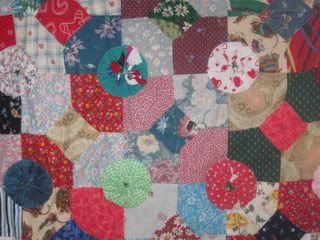
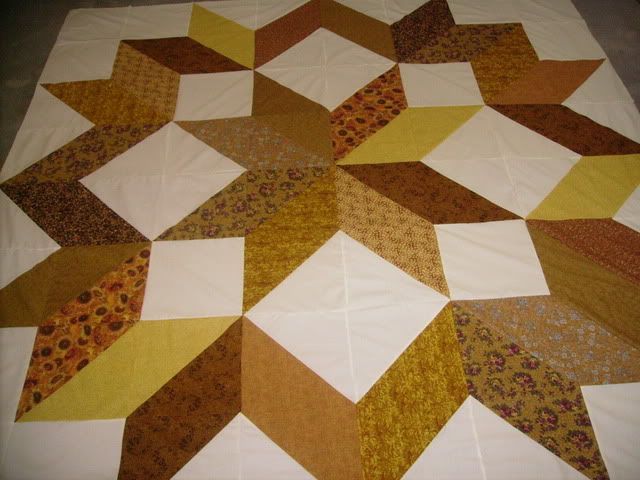
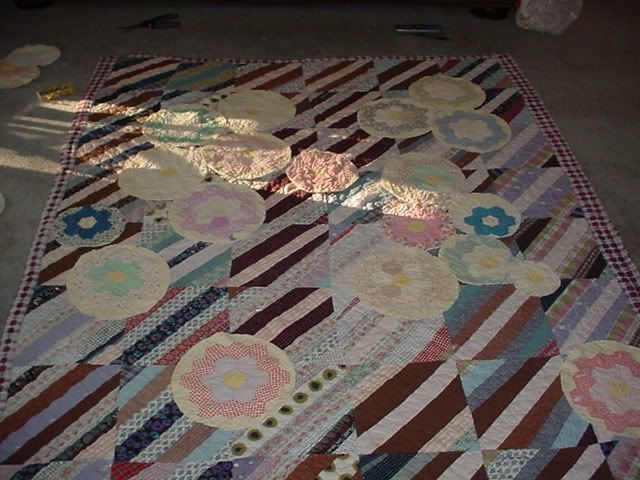
The layout on the front is just a concept and subject to change. By using circles from a cutter quilt I found at the thrift shop ($5!) I think I can keep the feel and add a little- Cheryl has been here- to the finished quilt.

I have told my sister what I hope to do, she is giving me free artistic control. She also knows I change my direction all the time on a project so I thought it would be fun to keep an on going journal of my progress.

Work will be edited in as it is finished.
I was given the quilt on the 4th of July weekend.
My goal is to give it back by her Birthday in Dec.

Finished Aug 31st -- I think I can do it!- cw

Saturday, July 25, 2009

What a yard sale and sold a house?


MO Broker- my Creative Side
• 2009-Jul-25 - I have another TO-DO!
I was able to sneak in some yard sales yesterday between showing houses. (I didn't really sneak b/c the client was with me) Found a box of scraps that I know I am going to have fun with. At first glance (that's all it takes) I was thinking some of it would go in the barbie doll pile (an on going tote of fabrics that may debut at doll dresses someday). Turns out after digging around that there a chunks of the fabrics that will be perfect for a crazy quilt.

I have another on going tote of men's ties, silks, velvets, etc... set aside for a fast crazy quilt experience (to date the pile has been seasoning about 10 yrs, might be getting ripe enough to officially be a ger-er-done- or a least a pull them out and fondle em agains)

Plan has been to collect till 'know' I am ready and spend up to 10 yrs hand working the blocks. could be a fun 'take along project' especially seeing as how my embroidery thread collection seems to be growing too.

The realist in me considers using machine stitching techniques to speed it along- but really after 10 yrs of collecting, do I look like I am in a hurry? I think it has been several yrs since I cut the muslin backing for the blocks. May be time to start pinning the larger pieces and see what I have.

I 'wrote' about this before I sorted it all and took the picture. Turns out I have several 'new to me' fabric scraps to add to the scrappy-scrappy pile. I don't have time to iron anything right now but have decided to start a TO-BE-IRONED box to take with me on road trips. How fun is it going to be to iron in the motel while hubby is napping!! (I don't want to ruin my "I don't iron at home" reputation! be good cw

Wednesday, July 15, 2009

Plan B- I went with the YELLOW's


I had a very long day today (don't ask) I was afraid I wouldn't get to make a CHUNK of the Celtic Knot Mystery. I am still several chunks behind the pack but I think I can catch up.


I decided to trade my light blues for the yellows/browns and am liking it. Good thing about waiting is I get to see how others are interpreting the block and learn from their choices.


I am sewing a 2" sq and hope to have a nice quilt to gift sometime in my lifetime.


I showed you mine now show me yours! be good cw


I haven't been as good about getting my progress posted as I had planned. Lynne has posted the first 17 (of 25) chunks. She was nice enough to give us a 'peek' at how a couple go together.
I promised to show mine thinking that I would get the 4th chunk done tonight after church.
It is going to have to wait till later, I got the urge to watch an old movie and work on my sisters quilt.
Gotta admit I am LOVING how easy this is. Just wish I was a bit faster. I don't want to be too far behind for the reveal.- cw

Tuesday, July 14, 2009

Celtic Knot

It all started here.....


I have copies of the pattern for the first three 'chunks' I am very excited to get started so I pulled fabrics and changed my mind a dozen times. (Isn't that the normal way to start a mystery?- second guess long enough to see what others are posting and then decided?)

In my defense, I did purpose to do another RW&B. I think I am almost sure, I guess, with my color choices. just kidding, I have it narrowed down to two ways to go-

Plan "A"--
Dark and Navy Blues.......


Light Blues..........


and.......REDS!


With a cream background fabric.


Plan "B" would be to use YELLOWS in place of the Light Blues. (Now that would be a very primary quilt!)

Tomorrow is the day to make the final decision and start cutting. I am going to use a 2" sq. (Actually plan to strip cut the 2 inches WOF and stack and sub-cut the sqs as needed. That way if I don't use the whole strip I can just add it back to my strips bin.

If you want to vote for Plan "A" or "B" feel free, there are no prizes and I will do what I want but you know jump in and offer an opinion- be good-- cw

Finally, I can get some decent photos!

I always knew I would trade quilting for house work. Now I know I will trade for equipment too. I am now the proud owner of a 'new to me' SONY" camera, 3-batteries, the charger, 3-storage disks(chips) for photos and....... the thingy that plugs into the computer to down load pictures.
The camera does all the zoom, time, date, stuff and shoots video. I am a happy, happy gal.
The unit is sturdy enough that I am not going to drop it, (I know I should use a case when transporting) or lose it under a pile of papers (or fabric).
Special THANKS to co-worker, Brian, for up-grading and getting himself a fancy, very impressive new toy.
Lucky me, lucky me, lucky me- now I can work on my photography skills and maybe get the whole quilt in a shot!!
Lucky Brian for getting to work with a quilter and get those drawers full of T-shirts turned into keepsakes. I love a Win/Win. be good cw

Sunday, July 12, 2009

Show me your BOW-TIES!


This first picture is the first Bow-Tie Quilt I made. The pieces were per-cut by hubbies grandmother and gifted to me from his mom. I remember sewing the four larger pieces to the smaller center square. At the time I thought: "There has to be an easier way"

A few years ago I asked our son to send me pictures of some of the quilts he has that I made. Here is that first Bow-Tie being displayed by Jesse's best friend Derek. I call the shot: The psychedelic nomad- and wonder if Joseph's coat was as colorful.


This top was made during another of my 'let's use up the solids' phase. The bows are from fabric given to me by a friend, I think they were left overs from clothing. Most look 50ish/60's and all were in new shape. Must have been stored well to age. I did this in the 5 sqs method. Way easier and my prefered method for bow-ties.


This made a colorful top for a future grand-child's room.


These are the first two tops I made using the 5 sq method. I had a thing for cream back-ground. I love the way the fabrics look so crisp. I also had fun trying different settings with the blocks. The larger pieces started with a 5" sq. the smaller were 2 1/2".


Both quilts have similar materials in them, kinda a 'since I am cutting any way let's try a different size'.
I like them both, the larger one is saved back for a special wedding gift.
The smaller blocks are in my personal collection*
*(just means one of my kids hasn't taken it home yet!)


Favorite Daughter-in-Law, Kelly and I were playing "Let's cut up the holiday prints". One of the tops we made was another bow-ties.

They are so fast and easy, it is hard to stop at just just one. The 5 sq. method leaves one open to picking up and making ties when ever the urge hits.


These were suppose to be part of an Ugly Quilt; The ties were made with 3 different fabrics per unit. The yo-yo centers were from a yard sale find.


I have made others and am sure I will make more. The bow-tie is a fun pattern to learn and can be sewn in any size you can think of.

Please share your favorite links to bow-tie tutorials b/c I have not written one myself.


There is nothing new under the sun, but we sure can have fun doing the same ole, same old in different fabrics!!

Please feel free to link to your favorite bow-tie blocks &/or tops when you comment. I love getting to be inspired by others

Saturday, July 11, 2009

I used pins!! saved time & $$ T-Shirt Quilt

I have made several T-shirt quilts over the years. I have tried several different techniques.

When Brian (a co-worker) asked if I could do anything with a pile of his favorite sports shirts, I felt compelled to say: "Sure"

Brian gave me free artistic control on layout and size.

Men make the best clients, they just want it done, don't talk about the details.

He likes RED so I think this one will get that color sheet on the back and quilted in a Herringbone pattern. (I don't do the meandering)

Top is 60 x 87 (ish) a nice twin size, throw it over the couch in the Man Cave!

Hope he enjoys it for a long time. --cw


Quick How to DO--
I know there are a lot of tutorial 'out there' on how to make a T-Shirt Quilt- well here's one more.

This way does not involve ironing! The key for me is to use 5 pins per piece (no more, no less). I do not use sizing, or stabilizer. (I rarely use pins when sewing so this is a big aaaaaahh haaaaa moment for me) The knits of the t-shirt have a mind of there own.

I pin each end, the middle and the middle of the middle and was able to control the blocks. I cut 15" blocks from the fronts (and back if there was a schedule) I had several shirts that had smaller images that I cut 12 1/2 x 15. (I used one per row of these shorties.)

A few of the shirts had info on the front and back that could be sewn together and made into a 15 x 15 block. (On those I didn't worry about an exact measurement, I just re-sized after sewing the two pieces together.)

On past projects I have not had the luxury of having all the shirts a similar size to start with. I have added borders to the smaller images and achieved a 'floating' look for the top. I found that the knit and cottons didn't play well together and made the top feel stiff (IMHO). They always turned out great and were well loved BUT I did NOT get to enjoy the process.

This one was fast and easy and 'feels' good. I saved the left over backs and larger areas to use as borders the next time I am asked to make a memory quilt from someones T-shirts.

Making the blocks the same size to start with saved so much time in the construction. Using pins (I know you thought I couldn't do it) saved me so much $$ not purchasing stabilizer.

Hope this helps you get motivated to sew your own keepsake quilt.- be good cw

Wednesday, July 8, 2009

Anniv. Quilt for 55th! Hope they like gold!

Linda finally pinned me down to start work on her parents anniv. quilt. The fabric was purchased months ago. The pattern was picked and changed several time. We decided on this star and to do it as a Big-Block Quilt.
I am a fan of taking a favorite block and super sizing it.
This is perfect for an 8 color project. In our case we didn't have enough of 3 of her fabrics to we added another three. (Eleven fabrics!)
This is on a 12 1/2" block for each block in the pattern. The easiest way to do a large quilt in my opinion. This beauty takes sixteen background blocks cut at 12 1/2" and sixteen background blocks cut at 14 1/2 (hey that's the size sqs I have- when the tri/sqs are re-sized I have strips for my strip box!!) Thirty two prints cut 14 1/2" and we were good to go.
I suggest making a "KEY" b/c it really helps in keeping the fabrics in order. I numbered mine 1-8 and on the three that were short, used an A & B.
Then go to town sewing the triangle/squares. I like the sew down both sides of the middle and cut apart and re-size method.

Here is a pile waiting to be re-sized.


These are the eight that ended up in the middle. I may never get such good points again! Must be because the quilt is not for me- lol


Linda is totally thrilled with our accomplishments. I think this is the best way ever to sew. Let your friend have a project in mind, buy the fabric, let you keep changing the patten, and then best of all, come over and wash dishes while you get to sew. (those that know me best, know I am always in the mood to help with your projects, especially if you pitch in on the housework- a total win-win.

Congrats to Linda's mom and dad on their 55th! I hope they enjoy this gift of love from their daughter. I also hope they have great cake at the reception! See ya on Saturday the 8th of August! Be good cw

Wednesday, July 1, 2009

Hi-Jacking a New Mystery: Celtic Knotwork Quilt

http://lynnesfreshhope.blogspot.com/2009/07/celtic-knotwork-1.html

Not making any promises but I am hoping to get a couple of more quilters to play along. Lynne has permission from Deborah Cohen to offer the original design as a mystery.
I hope to make a RW&B (and yellow) version for myself. I really, really need another patriotic quilt.

You can read about it on Lynnes blog and as soon as I get permission from her to re-post in my words I will start documenting my progress. good luck, can't wait to see who joins in. Go to Lynnesfreshhope.blogspot.com and sign up as a follower to see each step when it come available.

Read past posts to 'get a feel' for her writing and directions. Have fun and enjoy!