Thursday, May 2, 2013
Double Wedding Ring re-visit 2000
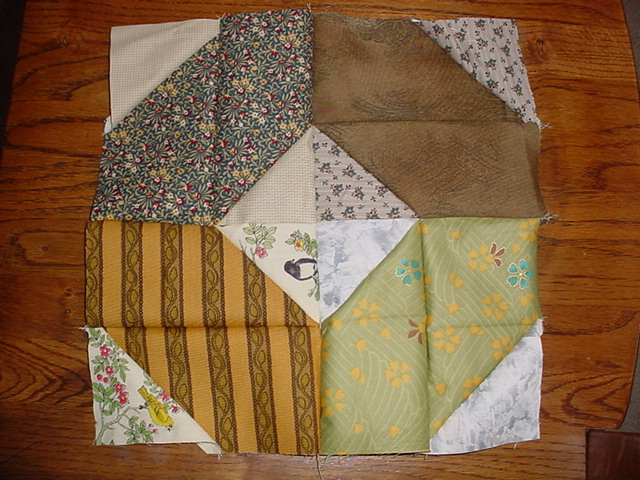
This is the start of a DWR (started in 2000 and still a WIP) I think I just got bored sewing the same pieces over and over. Today I decided to bag up the starter set (my new name for UFO's) and start over.
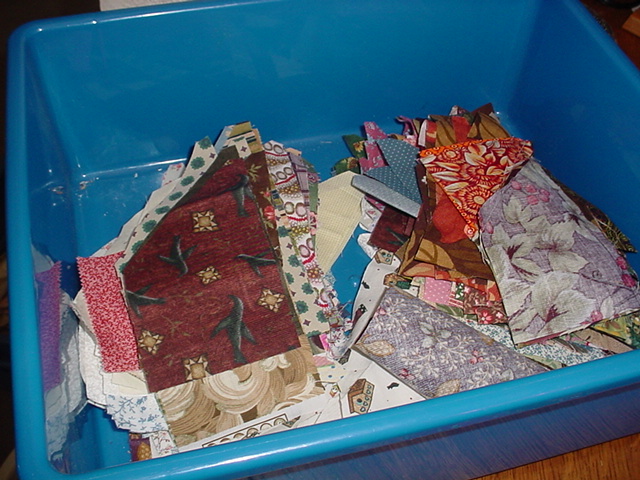
The yardage had all been cut into strips so I figured out my new GO Double Wedding Ring Die would work to get me excited again. Good friend Dawn is borrowing my cutter to work on her version of a DWR. I can sew arches together for a day or two before I have to commit to a background.
I def. want the cutter back to cut those!
Arches will have the Left and Right pieces constant through out. The setting sqs will be the burgundy and blue from the original project. The center three prints will be either light or dark red with blues on both sides. I think I will mix them up through out the top.
Any suggestions on which background to use? Kelly likes the pink or light yellow. I am leaning towards the green or pink. I may just flip a coin.
Tuesday, April 16, 2013
Window is installed, stained glass bulldog
This is my 4th stained glass piece. I am really enjoying this new hobby. Lucky for me, our house has a lot of windows!
I love how 'he' stand guard over the room at night.
I am thinking about doing a horse next. Now to find the right inspiration piece.
I love how 'he' stand guard over the room at night.
I am thinking about doing a horse next. Now to find the right inspiration piece.
Thursday, April 11, 2013
Orphan block, crumb quilt
I was digging through my 'collection' of blocks that didn't make it into a snuggle under for some reason or another. (I swear these multiply over the years) Many are extras from swaps or rejects gifted to ME b/c everyone knows I will eventually use them.
I got it in my mind that I just needed to sort the overflowing box and pull out favorites to use as pot holders or placemats. Now, what do I do with the rest?
TA DA----------a scrappy crumb style top!
First I sorted by size, I had enough 6.5 inch blocks to do a center. I sewed them log cabin style, starting in the middle and moving around clockwise with similar blocks. I got a 36 x 36 start on a future baby size quilt.
Then I got the idea to die cut the other blocks at 4 inches. The scraps from that cut will go into my 'crumb' tub. I sewed the cuts into strips. Then I added my new strips to the center in a 'courthouse steps' style.
I added a row to the left & right, then to the top & bottom. I then repeat till I used up all the strips. Left overs went to the crumb tote for 'next time'
A small inner border and a 6(ish) inch print should bring this up to a nice size keepsake.
I giggle b/c some of these 9 patches are from a swap in early 2000!
Next I had to raid my stash and look for a border print. The tan was pre-cut for a binding. I don't mind sewing bias, especially if I don't have to cut it first. The outer border was a yard of strip that never seemed to get picked for a project. I love how they both fit the scrappy top.
Don't hold your breath it may be awhile before I get around to picking a quilting pattern, I still have a rather large pile of future placemats to play with.
I got it in my mind that I just needed to sort the overflowing box and pull out favorites to use as pot holders or placemats. Now, what do I do with the rest?
TA DA----------a scrappy crumb style top!
First I sorted by size, I had enough 6.5 inch blocks to do a center. I sewed them log cabin style, starting in the middle and moving around clockwise with similar blocks. I got a 36 x 36 start on a future baby size quilt.
Then I got the idea to die cut the other blocks at 4 inches. The scraps from that cut will go into my 'crumb' tub. I sewed the cuts into strips. Then I added my new strips to the center in a 'courthouse steps' style.
I added a row to the left & right, then to the top & bottom. I then repeat till I used up all the strips. Left overs went to the crumb tote for 'next time'
A small inner border and a 6(ish) inch print should bring this up to a nice size keepsake.
I giggle b/c some of these 9 patches are from a swap in early 2000!
Next I had to raid my stash and look for a border print. The tan was pre-cut for a binding. I don't mind sewing bias, especially if I don't have to cut it first. The outer border was a yard of strip that never seemed to get picked for a project. I love how they both fit the scrappy top.
Don't hold your breath it may be awhile before I get around to picking a quilting pattern, I still have a rather large pile of future placemats to play with.
Sunday, April 7, 2013
stained glass bulldog
Just getting started on a window for our bedroom. My goal is to stain glass all the lower windows and hopefully do away with mini binds- lol
I started with the back ground pieces first b/c I really wanted to use this scrap glass in strips instead of cut it up. I like texture and am excited about how this is coming along.
Slow work but I am sneaking in a few minutes here and there. Maybe I can play hookie from work one day this week and get some time in on the face.
Window will be 19 x 29--cw
These eyes look really green in this light, they darken up as the day turns to night.
I started with the back ground pieces first b/c I really wanted to use this scrap glass in strips instead of cut it up. I like texture and am excited about how this is coming along.
| My grand daughter 'found' this piece in the scrap bin, I am determined to work it into this project! |
Slow work but I am sneaking in a few minutes here and there. Maybe I can play hookie from work one day this week and get some time in on the face.
Window will be 19 x 29--cw
These eyes look really green in this light, they darken up as the day turns to night.
Saturday, March 30, 2013
Two more Chisel tops
Another late night of sewing- lol chisel circles is almost done, just need to decide if I want another border and if so, what.
I had started to do a ribbon border but didn't think there was enough contrast. So....I sewed the ribbons together and bordered them for a small couch size piece.
I am down to the bottom of my chisel pieces, I either need to get on a different kick or bust some stash. Maybe tonight I can cut up some blues and make the chisel flowers. Wonder if that will get it out of my system. Wonder what die I am going to play with next!! What would you do?
I had started to do a ribbon border but didn't think there was enough contrast. So....I sewed the ribbons together and bordered them for a small couch size piece.
I am down to the bottom of my chisel pieces, I either need to get on a different kick or bust some stash. Maybe tonight I can cut up some blues and make the chisel flowers. Wonder if that will get it out of my system. Wonder what die I am going to play with next!! What would you do?
Friday, March 29, 2013
chisel circles die cut
Not a real tutorial but if you are like me and can get inspired by photos- here goes---(yes I know you get the same effect by adding triangles to the opp. corners of a sq) I already had the chisels cut so I am working this shape- you can use different fabrics for the two pieces. Mix it up it all turns out great.
I am slowly getting to the bottom of my chisel bin. Looks like I have just enough for a couple of more scrappy tops after this one :)
If case you are wondering why my machine is set on a place mat. The answer is I am sewing on the dinning room table and I can just push the machine out of the way if I need the space. This machine is a cheapie from Walmat and I have gotten a lot of mileage out of it. Great stitch and good speed. Scrap quilting doesn't need to be expensive.
| The stripes matching is purely accidental- just goes to show how accurate this die is! |
I am slowly getting to the bottom of my chisel bin. Looks like I have just enough for a couple of more scrappy tops after this one :)
| I pulled a handful of light colored triangles for my corners. |
| chain sew, make sure you have bobbin thread every once in awhile- lol |
| I had 80 sets pre-cut so this top will be sew 8 x 10 blocks |
Wednesday, March 27, 2013
borders borders border! Thanks GO dies
I have been having fun with the Chisel die. I love that you get lefts and rights when you cut multiple layers. I have an on going 'pile' that I am working my way through.
The majority of this top was made using all the same shape. Even in a scrap quilt you can control several elements and get a great over all look. For this one I used 4 same fabrics in each 'star' and used same orange triangles with each star. The borders are made using both rights and lefts of the prints with random orange triangles.
This top was made awhile back up I 'found' the perfect material for the outer border (it was precut in a stash that was gifted to me- lol) I did purchase $5. worth of black. Almost all from stash.
I wanted to play with solids, I think I wanted to sew more then cut. This will make a nice size baby quilt. Next time I will power through and cut enough for a bed size. I think I have a grand kid or two that would enjoy colorful and scrappy!
The majority of this top was made using all the same shape. Even in a scrap quilt you can control several elements and get a great over all look. For this one I used 4 same fabrics in each 'star' and used same orange triangles with each star. The borders are made using both rights and lefts of the prints with random orange triangles.
This top was made awhile back up I 'found' the perfect material for the outer border (it was precut in a stash that was gifted to me- lol) I did purchase $5. worth of black. Almost all from stash.
| I had two yards of this green with sunflowers on my shelf, Now half is on the quilt and the rest is going to get worked into another scrappy quilt! |
Subscribe to:
Posts (Atom)