Hard to Belive it is time to Dresden already! I can't wait to see the eye candy from this blog hop! Give Thanks to Madame Samm from !Sew WE Quilt! for letting me play along!
I love the look of the Dresden, I just don't love the traditional work to get to the look. I short cut by doing raw-edge applique. Years ago, I started with using the double sided iron on products. I quickly came to realize that for me it was too time consuming. The majority of my applique is now raw-edge w/glue stick. I have never had a recipient of one of my projects say- oh this would be more lovely if you had just taken time to needle turn- lol (They may think it, but anyone that loves me, knows better then to 'say it'!)
On a similar note, I have never had anyone tell me that one of my snuggle under quilts would have been warmer if I had only matched my corners better or not cut off a goose head.- You get the idea.
 |
| Scraps and raw-edge applique are an easy way to make an heirloom block! |

| My quilt was cut out on a trip from MO to OK and back. The sqs were cut using a cereal box template. The plate petals were cardboard too. I would grab a chunk of scraps and cut as much of either shape as I could get. Later I would 'deal' out the pieces into piles to mix up the fabrics. Years later I bought a die cutter and now I like to cut strips from my scraps and then sew and sub-cut. |
 |
| I use this quilt on my bed, the borders were added as a quick way to enlarge the top.(I have a king size bed) If I had planned it out better I may have done an outer border of scrappy sqs. I was actually a little tired of sewing sqs by the time I called this one done. The orange Swiss fabric used as the center circle was completely used up on this quilt. In fact I cut the circles first to know how many plates I was shooting for. |
 |
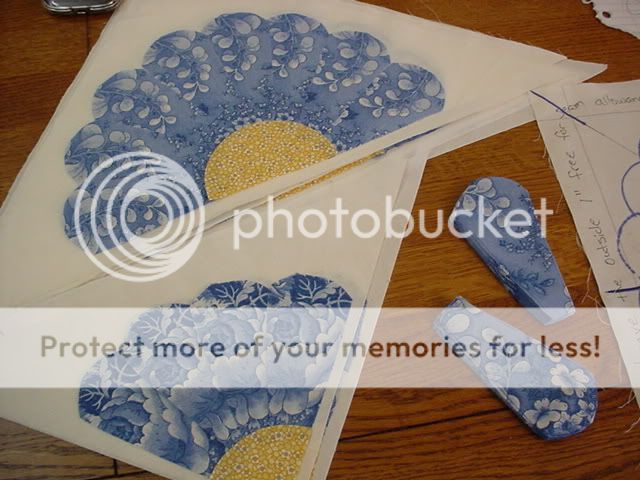
| While looking for something fun to 'give a way' I came across a set of 30 blocks that were cut out around the same time as my Dresden bed quilt. This packet is blades and circles only. I always enjoy uncovering a well hidden kit of fabrics from the past.(Who wants to take a guess as to the age of these beauties) - lol |
 |
| This is not a real tutorial but something I found helpful over the years doing applique. I have several guides for laying out designs. In this case I used a heavy pellon that I had on hand. I cut out a 15 inch sq and marked directional lines. I then added a circle to give reference to where my blades need to cover. (I couldn't find my original, so I quickly drew this one out, the inner circle is not placed as persist as I would have liked but you get the idea) |
 | |
| When I get ready to do multiple blocks I 'tape' my guide to the under side of my glass 'light' table. I can then place my real fabric on top and use the lines to lay out my petals. I use glue stick to tack my pieces in place. Having the pattern under the glass makes it easier to wipe up any over spill from the glue. The size of petal you are using, and the size of the circle will help determine the block size to shoot for. I like to do these little ones on a 10 1/2 or 12 1/2 inch block. |
 |
| I lay out my petals at 12,3, 6 and 9 (o'clock) Then fill in at the diagonal lines. (These are not glued down) |
 |
| If you choose you can leave every other petal over lapping. I tend to layer mine so the left side overlaps its neighbor, kinda in a fan style. I raw edge applique using a chicken scratch stitch so both sides of the seam are covered either way. I like to use an overcast stitch around the center circle and the outer edges. |
 |
| How crazy are some of these fabrics! Almost makes me want to stop and cut some backgrounds. A future TO DO? |
Run check out the other Dresden posts for today!
- Gingersnap Quilts
- Busy Bee Quilts
- She Sews the Blues
- Traveling Quilter
- Grand Mama's Stories
- Cherry Blossoms Quilting Studio
- Sew at Home Mummy
- The Slow Quilter
- Pig Tales and Quilts
- Annie Oak Design
- Jane's Fabrics & Quilts
- Tea Time Creations
Mo Broker My Creative Side(me- lol)- Just Let Me Quilt
- Words and Stitches
- Just Keep Swimming
- Sew Many Yarns
- Sowing Stitches
- Jane's Quilting
- My Patchwork Life
- 2muchfun
- Pumpkin Patch Quilter
- Quilt Monster in my Close
To tell you the truth, there are so many give-a-ways going on in the blog hop, I don't have a list of them all. SO...... for taking time to visit my humble post, I will throw a little something, something in the mail to a commenter to be named later. You know the drill, you must respond with in 48 hrs of email notification that your name was drawn. I will leave this invite open till then end of the hop. good luck! cw